
Show summary Hide summary
- Understand the film look before touching any controls
- Trick 1: Start shooting for analog film directly in-camera
- Trick 2: Use smart presets and apps instead of random filters
- Trick 3: Craft warm, dreamy tones with a repeatable edit recipe
- Take inspiration from music, cinema, and personal memories
- Build a small “look bible” for consistent photo transformation
- Do I need the latest phone to get an analog film look?
- Is shooting in RAW mandatory for a film-style edit?
- How much grain should I add to mimic analog film?
- Which apps are best for beginners who want a film look?
- How can I keep my film-style edits consistent across a photo series?
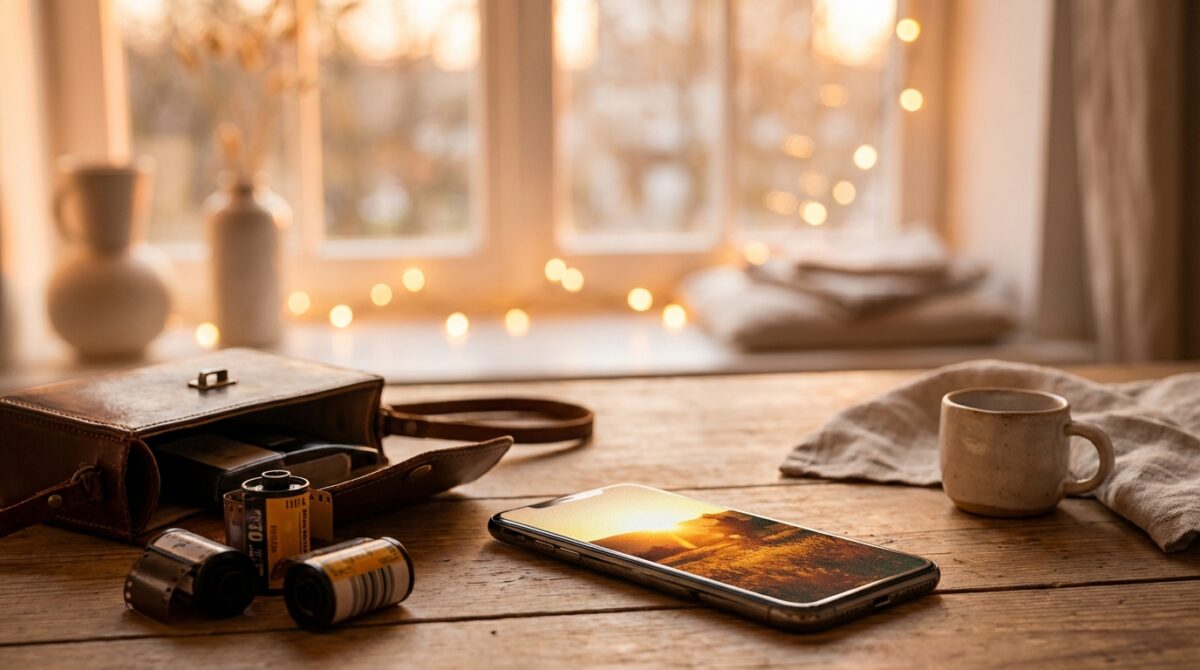
Your phone already holds the makings of a dreamy analog film camera; the difference lies in how you tame sharp digital perfection into soft, nostalgic glow. With just three targeted photo tricks, your everyday mobile photography begins to look like it came from a beloved shoebox of prints.
Understand the film look before touching any controls
Before our fictional creator Maya changed her phone photography, she stopped chasing “sharp and bright” and started chasing feeling. Analog film has a distinctive way of handling light, color, and texture that modern phones usually smooth out. When you understand this character, your photo editing choices become deliberate instead of random filter hopping.
Film tends to soften edges, roll off highlights gently, and render shadows with depth rather than pure black. Colors shift toward warm tones or subtle pastels, with skin often showing a gentle glow instead of razor‑sharp pores. Grain appears as an organic texture, not as digital noise. When you look at classic prints or cinema stills, you rarely see the ultra‑crisp contrast that default phone cameras produce.
Apple Explores Red as the Next Premium Hue for Upcoming iPhones
Rivian Launches Innovative Apple Watch App Featuring Vehicle Controls and Digital Key Access
Key ingredients of warm, dreamy film aesthetics
Several characteristics define the dreamy effect many people link with analog film. First, highlights often bloom slightly, especially around backlit windows, streetlights, or sunsets. Second, midtones carry most of the information, which keeps skin and skies gentle rather than harsh. Third, color palettes lean toward consistent, intentional bias, such as golden evenings or cool twilight blues, instead of neutral precision.
If you want a shortcut to studying this style, tools like the Vintage Film Color Emulator at Musely’s AI retro photo tool provide instant examples of how digital images can shift toward analog depth. By comparing your straight-out-of-camera shot with a film‑styled version, you start noticing small but important shifts in saturation, contrast, and grain that you can later re‑create manually.
Trick 1: Start shooting for analog film directly in-camera
The first trick has nothing to do with sliders. Maya changed the way she pressed the shutter so her raw material already leaned toward film aesthetics. Your phone’s sensor is small, so manufacturers rely on aggressive sharpening and HDR. You counter that by giving the camera a scene that naturally supports a softer, more cinematic interpretation.
Begin with light. Backlit scenes, golden hour walks, and overcast afternoons tend to translate beautifully into a warm, dreamy effect. Slight overexposure can help, especially for portraits and pastel landscapes. On most phones, you tap to focus, then drag the brightness icon a little higher. This mimics how Kodak Gold or Portra often look best when exposed slightly bright, giving skin tones a luminous quality.
Use simple shooting habits that favor a filmic result
Maya also simplified composition. Instead of relying on AI sky replacement or extreme HDR, she looked for clean backgrounds, strong shapes, and natural light direction. Framing someone against a window, a pale wall, or a soft sky keeps the scene easy to grade later. Busy details and mixed lighting often push the phone to overprocess, which undermines the vintage feel.
Another subtle but powerful tactic is to reduce digital sharpness before editing. On iPhone, switching to ProRAW lowers aggressive processing; on many Android phones, choosing RAW or “Pro” mode does the same. Several creators even attach a light mist filter in front of the lens, which softens micro‑contrast and adds a gentle bloom to highlights, echoing classic cinema lenses. Once you practice these habits, every frame you capture already leans toward a film‑friendly base.
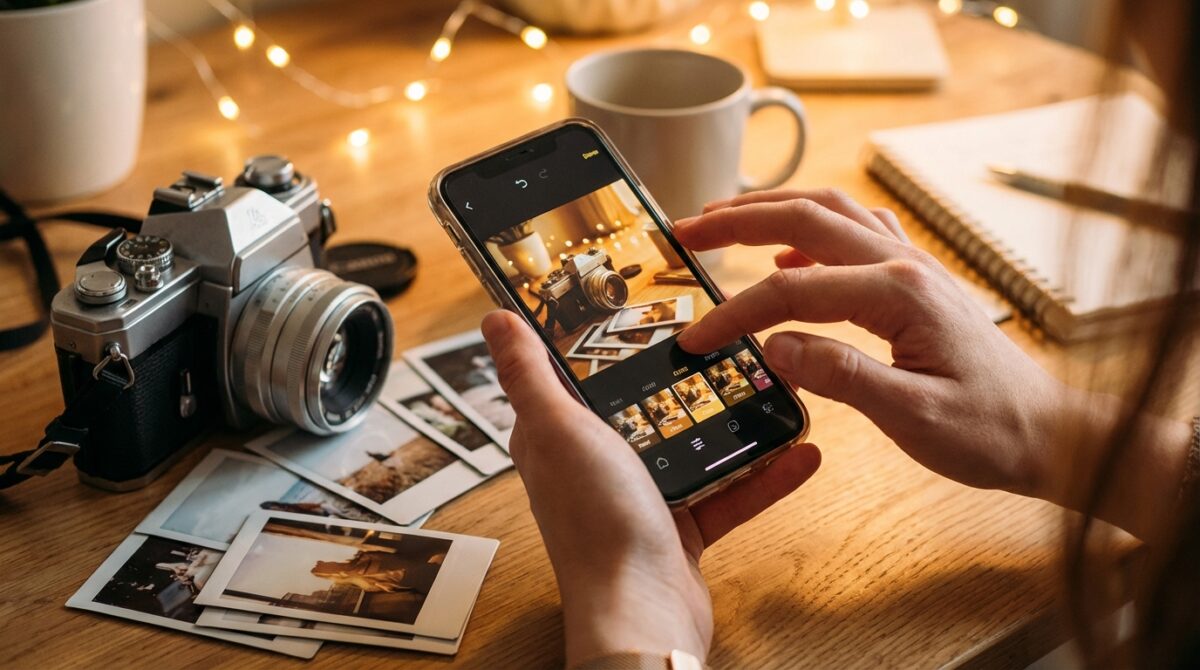
Trick 2: Use smart presets and apps instead of random filters
The second trick is about picking your tools carefully. Random social filters often deliver exaggerated fades and fake scratches, which can look gimmicky. Thoughtfully designed presets and apps emulate how analog film behaves under real lighting. Maya experimented widely, then settled on a small toolkit she could trust on both iOS and Android.
Apps like VSCO, Lightroom Mobile, and Snapseed remain popular because their film-inspired profiles start from real photo science rather than novelty effects. VSCO built its reputation on interpretations of Portra, Tri‑X, and other stocks. Lightroom lets you import preset packs designed by photographers who study lab‑scanned negatives. Snapseed, owned by Google, offers free film styles plus granular control for deeper creative editing.
Build a focused app stack for consistent film aesthetics
To keep results consistent, Maya limited herself to a core set of tools. She used VSCO for quick color moods, Lightroom for more advanced photo editing on series of images, and Snapseed for detailed tweaks like local brightness, grain, and blur. This limited palette prevented her feed from feeling chaotic, even as she explored varied subjects.
If you want further guidance, resources such as Shotkit’s guide to making digital photos look like film or tutorials on BeFunky and Fotor show how photographers translate lab experience into mobile workflows. For iPhone users specifically, curated roundups of apps that make your photos look like film can help you choose tools that prioritize subtlety over gimmicks. The objective is simple: build a predictable workflow that you can apply quickly while preserving your own style.
Trick 3: Craft warm, dreamy tones with a repeatable edit recipe
The third trick is where transformation truly happens: a deliberate editing recipe. Maya stopped relying on single-tap filters and started using a short sequence of adjustments. The process takes a minute or two per image yet delivers that soft, analog glow people associate with beloved prints and album covers.
Her baseline recipe in Snapseed or Lightroom followed a simple progression. She began with exposure and contrast, then moved to color balance, then texture and grain. Handling adjustments in this order prevents overcorrection and keeps skin looking believable. By repeating the same structure, she could quickly refine variations while maintaining a recognizable visual identity.
A practical step-by-step film-style workflow
Here is a condensed version of the kind of workflow many creators adopt for phone photography with a filmic twist:
- Slightly lift exposure and reduce global contrast to create softer midtones.
- Warm the white balance and push tint gently toward magenta for flattering skin.
- Lower highlights and raise shadows modestly, then add a gentle tone curve “S” for depth.
- Add noticeable but fine grain, adjusting size and roughness until it feels organic.
- Reduce clarity or structure, maybe add a touch of blur around the edges for a dreamy effect.
This framework can be adapted to different apps. Some people layer a mild vignette for focus, others prefer subtle split toning with warm highlights and slightly cooler shadows. Articles such as the practical guide on editing photos to look like film or longer deep dives from CNET and BeFunky illustrate alternative recipes, yet they all follow the same spirit: prioritize mood and texture over technical perfection.
Take inspiration from music, cinema, and personal memories
A final dimension often overlooked in technical tutorials is emotional reference. Maya did not choose her warm tones randomly; she built them from memories of summer evenings, family albums, and music that carried a similar atmosphere. Visual style becomes easier to maintain when it is anchored in something you can describe and feel.
Think about how certain album covers or films look. The hazy pads and distant city lights associated with records like M83’s cult favorite, explored in this deep dive on their frosty soundscape, mirror the way some creators grade night photos: cool shadows, blooming highlights, and a sense of distance. You can translate similar moods into your mobile photography by leaning into color biases and subtle blur that match the feelings that music evokes.
Build a small “look bible” for consistent photo transformation
To keep her style coherent, Maya created a small “look bible” on her phone. She saved a few reference images, noted the approximate settings she liked for warmth, grain, and contrast, and returned to them whenever she felt lost. Over months, her grid began to look curated rather than accidental. Friends recognized her photos immediately, even without seeing her name.
When you tie technical decisions to personal references, creative editing turns into storytelling. Those three easy tricks—shooting with film in mind, using focused tools, and following a repeatable recipe—become a framework for translating your memories into pictures. The more intentional your references, the more your analog film style feels like yours instead of a generic preset.
Do I need the latest phone to get an analog film look?
You do not need a flagship device. Any recent smartphone that lets you control exposure and save reasonably clean files is enough. Film-style images come from choices about light, composition, and editing, not from megapixel counts or advanced zoom modules. Even mid-range phones can deliver convincing analog character with careful processing.
Is shooting in RAW mandatory for a film-style edit?
RAW files offer more flexibility for recovering highlights and adjusting color, which helps when aiming for gentle roll-off and warm tones. However, they are not mandatory. Many people achieve pleasing results from JPEG or HEIF if exposure is close and they avoid extreme corrections. Starting with good light matters more than file format.
How much grain should I add to mimic analog film?
Grain should be visible but not distracting. Start with a moderate strength, then zoom in and check skin, skies, and flat areas. If grain dominates faces or turns gradients into rough patches, reduce the amount or size. Different moods call for different levels: portraits often suit finer grain than street or night scenes.
Which apps are best for beginners who want a film look?
Meta Aims to Launch Its First Smartwatch Later This Year
Top Budget-Friendly Smartphones to Watch for in 2026
VSCO, Snapseed, and Lightroom Mobile are reliable starting points. VSCO offers curated film-style presets, Snapseed is free and powerful for detailed control, and Lightroom provides advanced sliders and preset packs. Choose one or two and learn them well instead of switching between many apps with shallow familiarity.
How can I keep my film-style edits consistent across a photo series?
Create a simple editing recipe and save it as a preset when the app allows it. Use similar lighting conditions when shooting, then apply the same basic adjustments for exposure, warmth, contrast, and grain. Regularly compare new images with older favorites to check whether the overall mood, color bias, and texture still align with your desired look.